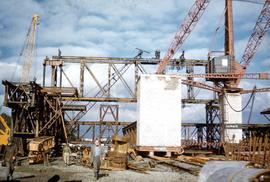
Construction site on riverbank as work begins on Tasman Bridge; cranes, steel scaffolding and brickwork evident. Workers in hard hats; one man striding towards camera, wearing gumboots is poking his tongue out at the photographer.
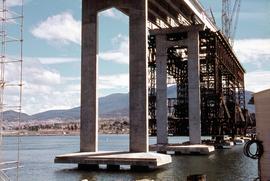
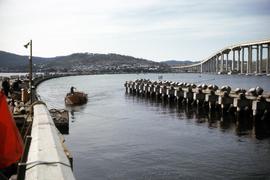
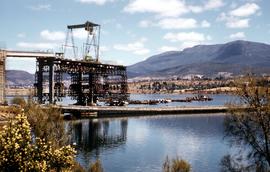
Colour photograph shows pylons supporting Tasman Bridge, viewed from the Derwent’s Eastern Shore, during construction of the Tasman Bridge across the Derwent River, 1964.
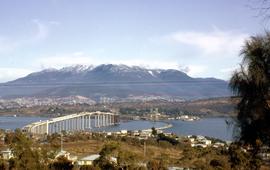
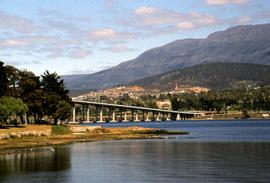
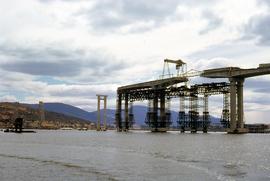
Colour photograph shows construction of Tasman Bridge, from Derwent River’s Eastern Shore. Shows spans of Tasman Bridge almost completed from Eastern Shore, temporary floating Hobart Bridge upstream of new multi-lane road bridge; snow on Mount Wellington in background. Printing or scanning error in photograph/slide shows coloured lines horizontally through. photograph.
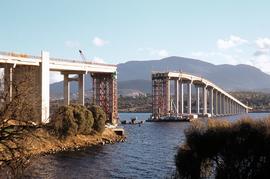
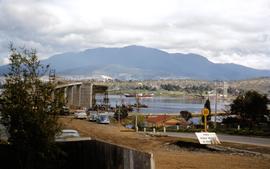
Photograph in colour, taken from Eastern Shore of Derwent River, depicting repairs to roadway and pylons damaged in January 1975 crash of bulk ore carrier Lake Illawarra. Mount Wellington in background.
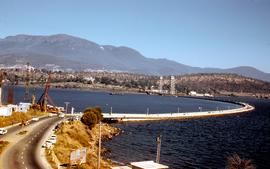
Colour photograph shows site of repair work to Tasman Bridge, damaged by the crash of the ore carrier Lake Illawarra in January 1975. Photo taken from Eastern Shore of Derwent.
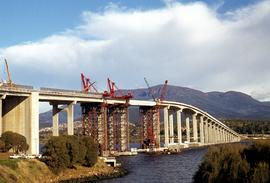
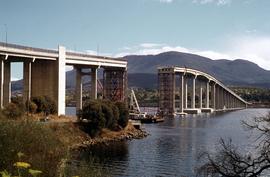
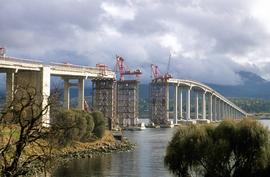
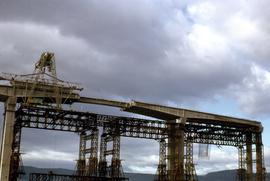
Colour photograph shows site of repair work to Tasman Bridge, damaged by the crash of the ore carrier Lake Illawarra in January 1975; missing pylons being replaced
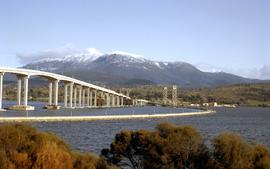
Colour photograph of two bridges across the Derwent River, the Hobart Bridge, right, and the Tasman Bridge, left, as viewed from the eastern shore of the Derwent in August 1964. Snow caps Mount Wellington in the background.
Colour photograph taken from the western shore of the Derwent River, depicts vehicles travelling on the temporary, floating Hobart Bridge, while the nearly complete multi-lane Tasman Bridge to join the eastern and western shores of the river, is visible downstream.
Colour photograph of 30 MPH speed limit to motorists approaching the Hobart Bridge during construction of the downstream Tasman Bridge, from the eastern shore of the Derwent River.
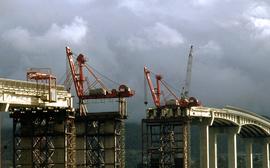
Colour photograph shows cranes atop pylons at the site of repair work to Tasman Bridge, damaged by the crash of the ore carrier Lake Illawarra in January 1975; missing pylons being replaced.
Colour photograph shows office and construction depot of Bridge Co on Derwent’s Eastern Shore, during construction of the Tasman Bridge across the Derwent River, 1964.
Colour photograph of the centre span of the Tasman Bridge is under construction in 1963, as viewed from a vehicle travelling on the nearby Hobart Bridge, which carries vehicular traffic across the Derwent River on a temporary, floating platform.
Colour photograph shows construction of a temporary traffic span of the new Tasman Bridge, as viewed from the western shore of the Derwent River, in 1964; the floating Hobart Bridge upstream is visible in background.
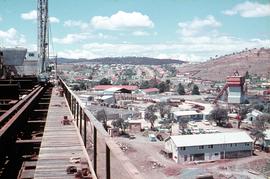
Colour photograph shows construction of the Tasman Bridge, in early 1960s, as viewed from the eastern shore of the Derwent River; the floating Hobart Bridge is visible in foreground; Mount Wellington in distance, with dry grasslands in the foothills of the mountains, visible on western shore of river.
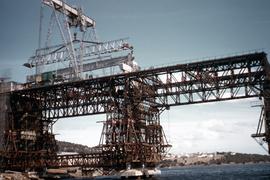
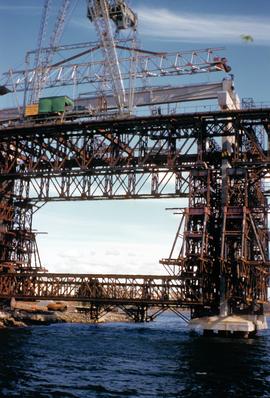
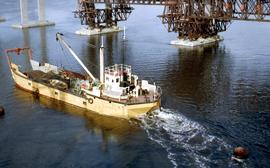
Colour photograph shows construction of Tasman Bridge, with scaffolding, cranes and workers atop frame, photographed from the water, bridge built across the Derwent River, taken 1963.
Colour photograph depicts vehicular traffic on the temporary, floating Hobart Bridge, as consctruction begins downstream on the multi-lane Tasman Bridge to join the eastern and western shores of the river.