- AU TAS UTAS SPARC W9-Ph-142-9
- Sub-item
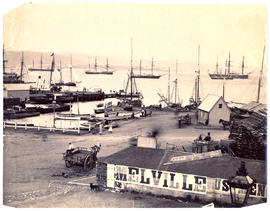
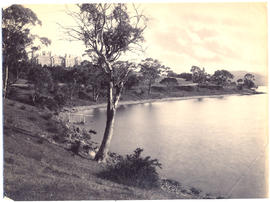
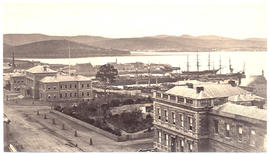
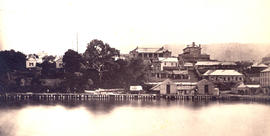
- c1880
Part of Walker Family Papers
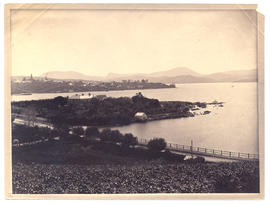
View of Hobart waterfront c.1880 showing docks, carts, ships at anchor and woodyard
300 results with digital objects Show results with digital objects
Part of Walker Family Papers
View of Hobart waterfront c.1880 showing docks, carts, ships at anchor and woodyard
Part of Walker Family Papers
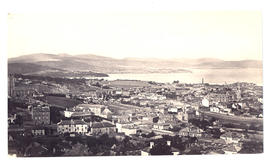
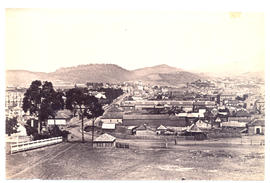
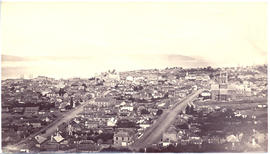
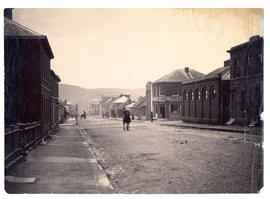
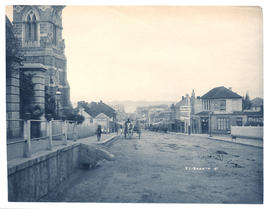
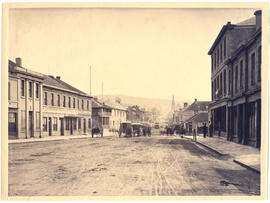
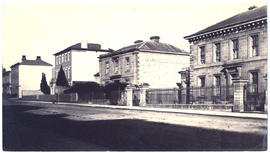
Photograph from the collection of James Backhouse Walker of an elevated view of Hobart looking east taken near Browne Street, (about 1876, according to a note on the reverse). Warwick Street in the foreground. Photographed by Henry Hall Baily who had studios in Elizabeth and Liverpool Streets, Hobart from 1865 until 1918.
James Backhouse Walker
Part of Walker Family Papers
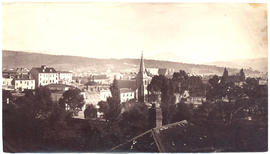
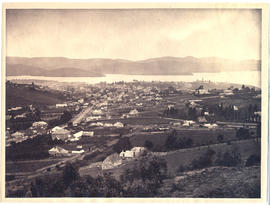
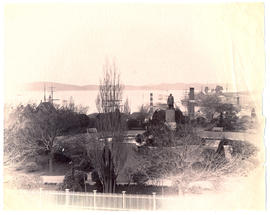
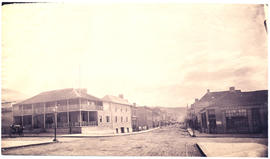
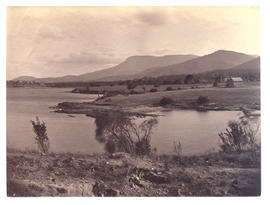
Photograph from the collection of James Backhouse Walker of Hobart viewing over St. Davids Park, probably from Hampden Road, (in about 1878 according to a note on the reverse). The photographer is Henry Hall Baily who had studios in Elizabeth and Liverpool Streets Hobart from 1865 until 1918.
.
James Backhouse Walker
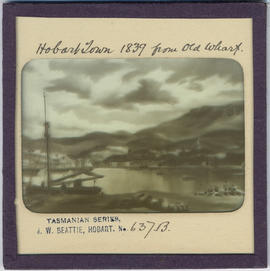
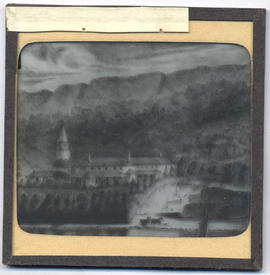
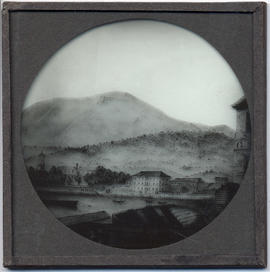
Hobart Town, Van Diemen's Land, from Old Wharf in 1839
Part of Walker Family Papers
Lantern slide of Hobart Town, Van Diemen's Land, from Old Wharf in 1839. From the collection of James Backhouse Walker. Prepared by J.W. Beattie (1859-1930) whose studio locations were in Elizabeth Street, Hobart from 1891-1920, Murray Street from 1921-40 and Cat and Fiddle Arcade, Hobart, until 1994.
John Watt Beattie
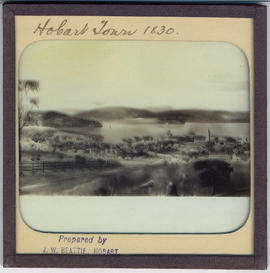
Hobart Town, Van Diemen's Land in 1830
Part of Walker Family Papers
Lantern slide of early print of Hobart Town, Van Diemen's Land in 1830. From the collection of James Backhouse Walker. Prepared by J.W. Beattie (1859-1930) whose studio locations were in Elizabeth Street, Hobart from 1891-1920, Murray Street from 1921-40 and Cat and Fiddle Arcade, Hobart, until 1994.
John Watt Beattie
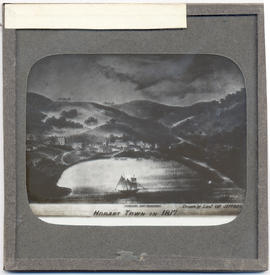
Hobart Town, Van Diemen's Land in 1817
Part of Walker Family Papers
Lantern slide of Hobart Town, Van Diemen's Land, in February, 1817. Inscribed with the words 'Hobart Town in 1817. Drawn by Lieut. Charles Jeffreys' - also shows the Government schooner the Kangaroo , church, Government House and Fort.
Charles Jeffreys
Hobart Town, Van Diemen's Land from the Harbour
Part of Walker Family Papers
Lantern slide of an early print of Hobart Town, Van Diemen's Land from the harbour. From the collection of James Backhouse Walker. Thought to have been prepared by J.W. Beattie (1859-1930) whose studio locations were in Elizabeth Street, Hobart from 1891-1920, Murray Street from 1921-40 and Cat and Fiddle Arcade, Hobart, until 1994.
John Watt Beattie
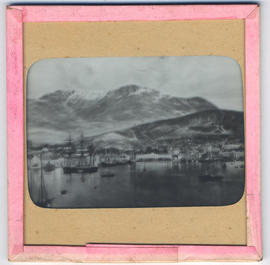
Hobart Town Harbour, Van Diemen's Land
Part of Walker Family Papers
Lantern slide of Hobart Town Harbour, Van Diemen's Land, in 1830. Prepared by J.W. Beattie (1859-1930) whose studio locations were in Elizabeth Street, Hobart from 1891-1920, Murray Street from 1921-40 and Cat and Fiddle Arcade, Hobart, until 1994.
John Watt Beattie
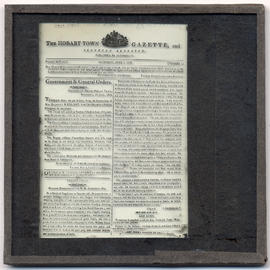
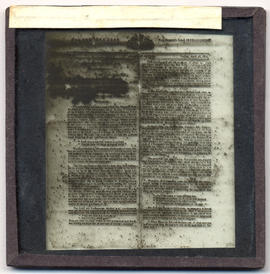
Part of Walker Family Papers
Lantern slide of front page of the Hobart Town Gazette, June 1816. Prepared by J.W. Beattie (1859-1930) whose studio locations were Elizabeth Street, Hobart from 1891-1920, Murray Street from 1921-40 and Cat and Fiddle until 1994.
John Watt Beattie
Hobart Town from the Queen's Domain
Part of Walker Family Papers
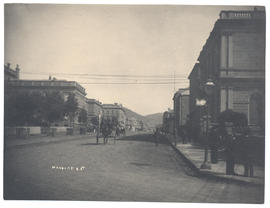
Photograph of Hobart Town, Tasmania, from the Queen's Domain, looking down Macquarie Street in the 1850s. This photograph appears on page 27 of Allan Sierp's 'Colonial Life in Tasmania: Fifty Years of Photography 1855-1905' (Rigby, 1976)
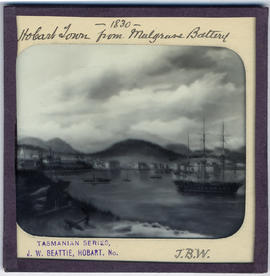
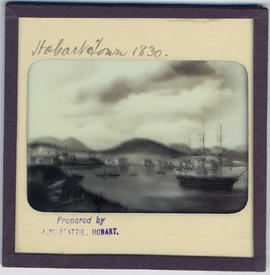
Hobart Town from Mulgrave Battery, Van Diemen's Land
Part of Walker Family Papers
Lantern slide of Hobart Town from Mulgrave Battery, Van Diemen's Land, in 1830. From the collection of James Backhouse Walker. Prepared by J.W. Beattie (1859-1930) whose studio locations were in Elizabeth Street, Hobart from 1891-1920, Murray Street from 1921-40 and Cat and Fiddle Arcade, Hobart, until 1994.
John Watt Beattie
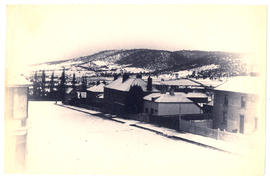
Part of Walker Family Papers
Photograph from the collection of James Backhouse Walker of a Hobart streetscape in snow - looking towards Mt Nelson and Sandy Bay.
James Backhouse Walker

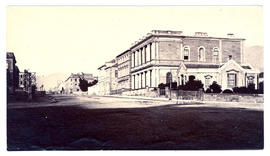
Part of Walker Family Papers
Lantern slide of Hobart Savings Bank, Murray Street Hobart c1860. Prepared by J.W. Beattie (1859-1930) whose studio locations were Elizabeth Street, Hobart from 1891-1920, Murray Street from 1921-40 and Cat and Fiddle until 1994.
John Watt Beattie
Hobart Regatta Grandstand from the water
Part of Walker Family Papers
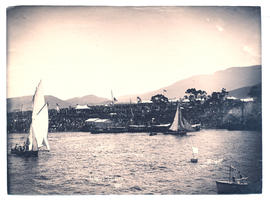
Photograph of the Hobart Regatta grandstand taken from the water in 1886. The photographer was Albert Sargeant who had studios in Macquarie Street, Hobart, Tasmania from 1886-1890 and George Street, Launceston, Tasmania from 1900-1913.
Albert Sargeant
Part of Walker Family Papers
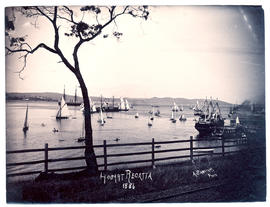
Photograph of the Hobart Regatta taken in 1886. The photographer was Albert Sargeant who had studios in Macquarie Street, Hobart from 1886-1890 and George Street, Launceston from 1900-1913
Albert Sargeant
Part of Walker Family Papers
Photograph of Hobart from the Queen's Domain with the railway station in the foreground, c. 1881. The photographers were Anson Brothers who had studios in Liverpool, Collins and Elizabeth Streets between 1878 and 1891.
Anson Brothers

Part of Walker Family Papers
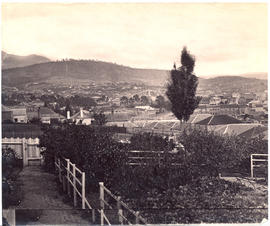
Photograph from the collection of James Backhouse Walker of a view of Hobart looking South East with a garden in the foreground and Elizabeth Street in the middle distance. The photographer is Alfred Winter who had studios in Bathurst, Elizabeth and Liverpool Streets from 1874-1880.
James Backhouse Walker
Part of Walker Family Papers
Photograph from the collection of James Backhouse Walker of a view of Hobart looking south along Barrack Street toward St Georges Hill, Battery Point
James Backhouse Walker

Part of Walker Family Papers
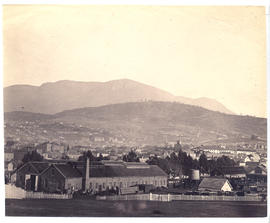
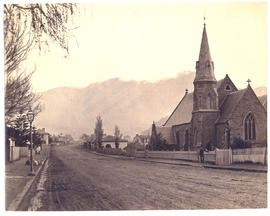
Photograph from the collection of James Backhouse Walker of a view of Hobart from West Hobart looking east toward the river, showing Holy Trinity Church. The photographer is Henry Hall Baily who had studios in Elizabeth and Liverpool Streets Hobart from 1865 until 1918..
James Backhouse Walker
Hobart from the top of Murray Street
Part of Walker Family Papers
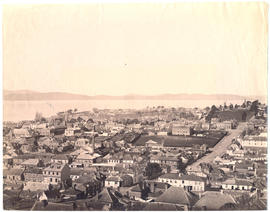
Photograph from the collection of James Backhouse Walker of a view of Hobart from the top of Murray St in about 1876 according to notes on the reverse. The photographer is Henry Hall Baily who had studios in Elizabeth and Liverpool Streets Hobart from 1865 until 1918.
James Backhouse Walker

Hobart from the Railway Station
Part of Walker Family Papers
Photograph of Hobart, Tasmania from the railway station, in about c1881.
Hobart from Huon Road looking east
Part of Walker Family Papers
Photograph from the collection of James Backhouse Walker of a view of Hobart from Huon Road looking east in about 1879, according to notes on the reverse.
James Backhouse Walker
Hobart from a garden behind Salamanca Place
Part of Walker Family Papers
Photograph from the collection of James Backhouse Walker of a view of Hobart from a garden behind Salamanca Place.
James Backhouse Walker
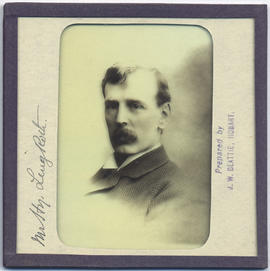
Henry Ling Roth (1855-1925) Tasmania
Part of Walker Family Papers
Lantern slide photograph of Henry Ling Roth. Prepared by J.W. Beattie (1859-1930) whose studio locations were Elizabeth Street, Hobart from 1891-1920, Murray Street from 1921-40 and Cat and Fiddle until 1994.
John Watt Beattie
Harrington Street with the Collins Street intersection
Part of Walker Family Papers
Photograph thought to be of Harrington Street, Hobart near the Collins street intersection
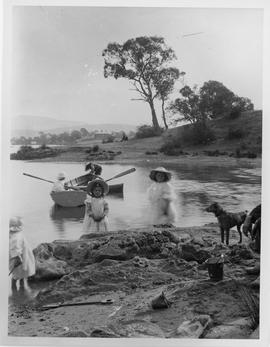
Part of Dennison Collection
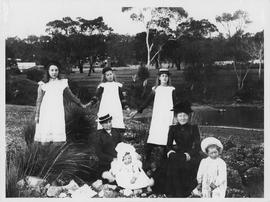
Photograph of a group on the rocky foreshore. Two older women with young children and three young girls in pinafores holding hands in the background. Thought to be taken at Beltana now Lindisfarne.
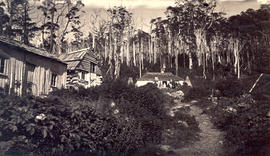
Group at Woods Huts, Mt Wellington
Part of Walker Family Papers
Photograph of a group of people outside of Woods Hut, Mt Wellington.
James Backhouse Walker
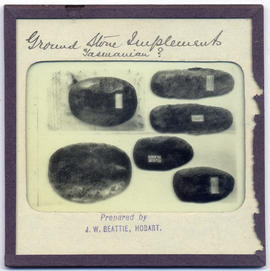
Ground stone Aboriginal implements
Part of Walker Family Papers
Lantern slide of ground stone aboriginal implements. Prepared by J.W. Beattie (1859-1930) whose studio locations were Elizabeth Street, Hobart from 1891-1920, Murray Street from 1921-40 and Cat and Fiddle until 1994.
John Watt Beattie
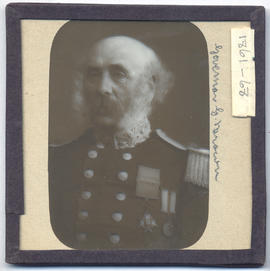
Governor Sir Thomas Gore Browne
Part of Walker Family Papers
Lantern slide of Governor Sir Thomas Gore Browne. Governor of Tasmania from 1861-1868. Prepared by J.W. Beattie (1859-1930) whose studio locations were Elizabeth Street, Hobart from 1891-1920, Murray Street from 1921-40 and Cat and Fiddle until 1994.
John Watt Beattie
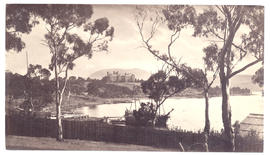
Government House from the shipyards
Part of Walker Family Papers
Photograph of Government House, Hobart, Tasmania in about 1870. Showing the shipyard in the foreground and Mount Direction behind.. The photographer was Henry Hall Baily who had studios in Elizabeth and Liverpool Streets, Hobart from 1865 until 1918.
Henry Hall Baily
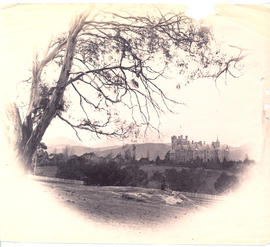
Government House from the Queen's Domain
Part of Walker Family Papers
Photograph of Government House, Hobart taken from the Queen's Domain, c. 1890s. A note on the reverse says 'after railway'. The photographer was Henry Hall Baily who had studios in Elizabeth and Liverpool Streets, Hobart from 1865 until 1918.
Henry Hall Baily
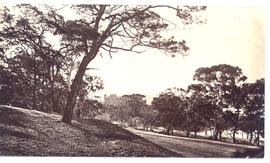
Government House from the Domain
Part of Walker Family Papers
Vignette photograph of Government House, Hobart, Tasmania taken from the Domain in about 1880. Showing gentleman in a bowler hat sitting on mound.
Part of Walker Family Papers
Photograph of Government House Hobart taken from the bay below the Queen's Domain, c.1890s. The photographer was Henry Hall Baily who had studios in Elizabeth and Liverpool Streets, Hobart from 1865 until 1918.
Henry Hall Baily
Government House and St David's Cathedral, Van Diemen's Land
Part of Walker Family Papers
Lantern slide of Government House and St David's Cathedral, Van Diemen's Land. Prepared by J.W. Beattie (1859-1930) whose studio locations were Elizabeth Street, Hobart from 1891-1920, Murray Street from 1921-40 and Cat and Fiddle until 1994. Lantern slide of detail from 'The Seat of His Excellency Lieut. Govr. Arthur / drawn from Nature and on Stone' by Charles Atkinson d.1837
John Watt Beattie
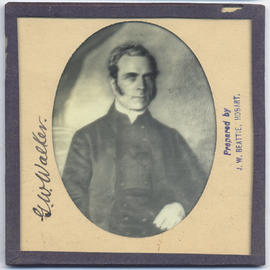
Part of Walker Family Papers
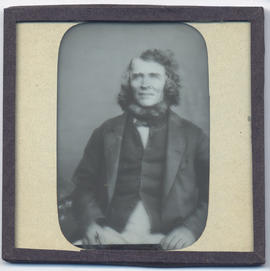
Lantern slide of George Washington Walker (1800-1859). Prepared by J.W. Beattie (1859-1930) whose studio locations were Elizabeth Street, Hobart from 1891-1920, Murray Street from 1921-40 and Cat and Fiddle until 1994.
John Watt Beattie
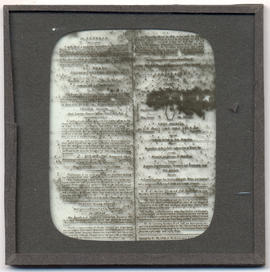
Funeral notice of Lieutenant Governor David Collins
Part of Walker Family Papers
Lantern slide of funeral notice of Lieutenant Governor David Collins, 1810. From The Derwent Star, and Van Diemen’s Land Intelligencer no. 7, Tuesday April 3rd 1810. Prepared by J.W. Beattie (1859-1930) whose studio locations were Elizabeth Street, Hobart from 1891-1920, Murray Street from 1921-40 and Cat and Fiddle until 1994.
John Watt Beattie
Franklin Square and Hobart waterfront
Part of Walker Family Papers
Photograph from the collection of James Backhouse Walker of Franklin Square and the Hobart waterfront taken in about 1870 possibly from St. David's Cathedral according to a note on the reverse. The photographer is Henry Hall Baily who had studios in Elizabeth and Liverpool Streets Hobart from 1865 until 1918.
Henry Hall Baily
Part of Walker Family Papers
Photograph of Franklin Square Hobart was taken by the Anson Brothers photographers, whose firm was located in Liverpool, Collins and Elizabeth Streets between 1878 and 1891.
Anson Brothers
Part of Walker Family Papers
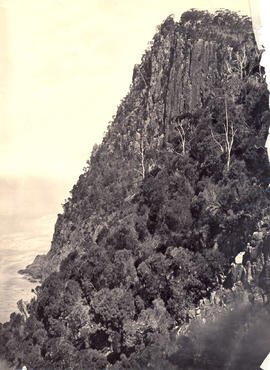
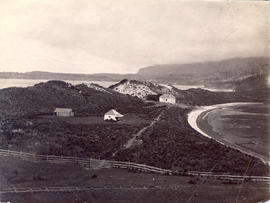
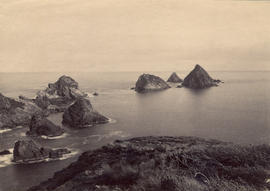
Photograph of Fluted Cape, Adventure Bay, Bruny Island, Tasmania. The photographer was Henry Hall Baily who had studios in Elizabeth and Liverpool Streets, Hobart from 1865 until 1918
Henry Hall Baily
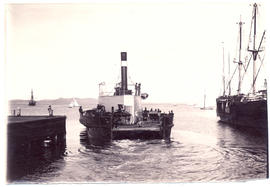
Ferry S.S. Kangaroo leaving the dock
Part of Walker Family Papers
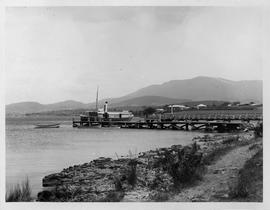
Photograph of ferry S.S. Kangaroo, leaving the dock in Hobart for Bellerive (Kangaroo Point) with carriages on board. c. 1880 H
Ferry at the Lindisfarne Jetty
Part of Dennison Collection
Photograph of a ferry approaching the Lindisfarne jetty.
Fern Tree Bower and Silver Falls,
Part of Walker Family Papers
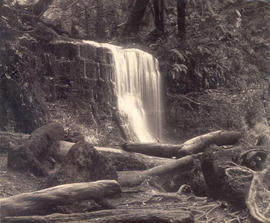
Photographs of Silver Falls, Fern Tree Bower, Mount Wellington c.1880 taken by Anson Brothers who had studios in Liverpool, Collins, and Elizabeth Streets between 1878 and 1891.
James Backhouse Walker
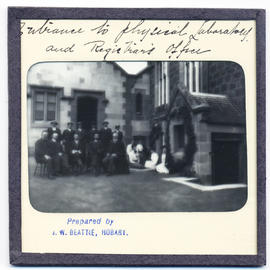
Part of Walker Family Papers
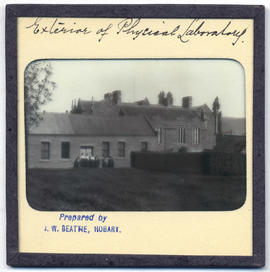
Lantern slides of the University of Tasmania, Queen's Domain, Hobart. Views of exterior and laboratories and library. Prepared by J.W. Beattie (1859-1930) whose studio locations were Elizabeth Street, Hobart from 1891-1920, Murray Street from 1921-40 and Cat and Fiddle until 1994 (Collection Pr.S.Uni/1-8)
John Watt Beattie
Part of Walker Family Papers
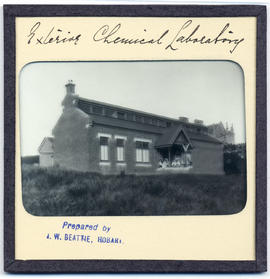
Lantern slides of the University of Tasmania, Queen's Domain, Hobart. Views of exterior and laboratories and library. Prepared by J.W. Beattie (1859-1930) whose studio locations were Elizabeth Street, Hobart from 1891-1920, Murray Street from 1921-40 and Cat and Fiddle until 1994 (Collection Pr.S.Uni/1-8)
John Watt Beattie
Part of Walker Family Papers
Lantern slide of Elizabeth Street, Hobart looking north. Prepared by J.W. Beattie (1859-1930) whose studio locations were Elizabeth Street, Hobart from 1891-1920, Murray Street from 1921-40 and Cat and Fiddle until 1994.
John Watt Beattie
Elizabeth Street from Memorial Congregational Church
Part of Walker Family Papers
Photograph of Elizabeth Street looking toward the harbour from the Memorial Congregational Church
Elizabeth Street outside C. Davis Importer of English and American Hardware
Part of Walker Family Papers
Photograph of Elizabeth Street looking north, outside C. Davis Importer of English and American Hardware. Showing horse drawn carts and coach.
Alfred Winter
Elizabeth Street looking toward Memorial Congregational Church
Part of Walker Family Papers
Photograph of Elizabeth Street Hobart looking north in about 1879. Legrands old shop is on the right and the old post offfice and Ship hotel are also visible according to notes on the reverse of the photo. Also shown is the Tasmanian pale ales store and the All Nations hotelThe photographer is Alfred Winter who had studios in Bathurst, Elizabeth and Liverpool Streets from 1869 until 1891.
Alfred Winter
Elizabeth Street from Collins Street corner
Part of Walker Family Papers
Photograph of Elizabeth Street, Hobart from the AMP society office on the corner of Collins Street with the Ship hotel in the foreground..
Eastern end of Macquarie Street
Part of Walker Family Papers
Photograph of the eastern end of Macquarie Street showing the trees on the edge of Franklin Square and horse drawn carriages.
Early Hobart Town, Van Diemen's Land
Part of Walker Family Papers
Lantern slide from the collection of James Backhouse Walker of early Hobart Town, Van Diemen's Land from the harbour. Thought to have been prepared by J.W. Beattie (1859-1930) whose studio locations were in Elizabeth Street, Hobart from 1891-1920, Murray Street from 1921-40 and Cat and Fiddle Arcade, Hobart, until 1994. Quaker Collection.
John Watt Beattie
Part of Walker Family Papers
Photograph of Eaglehawk Neck. The photographers are Anson Brothers., Portrait and Landscape Photographers, Hobart Town whose firm was located in Liverpool, Collins and Elizabeth Streets between 1878 and 1891.
Anson Brothers
Part of Walker Family Papers
Photograph of Derwentwater, Sandy Bay, Tasmania, home of Captain Langdon Swan, c.1881. The photographer was Alfred Winter who had studios in Bathurst, Elizabeth and Liverpool Streets from 1869 until 1891.
James Backhouse Walker
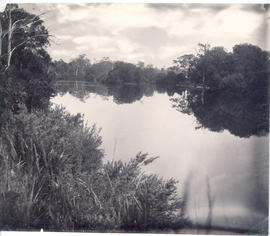
Derwent River above New Norfolk
Part of Walker Family Papers
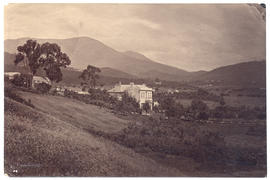
Photograph of the Derwent River just above New Norfolk, Tasmania. Showing track, buildings, orchard and river.
Derwent River above New Norfolk
Part of Walker Family Papers
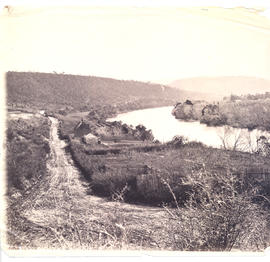
Photograph of the Derwent River above New Norfolk, Tasmania. Looking down the river.
Derwent River above New Norfolk
Part of Walker Family Papers
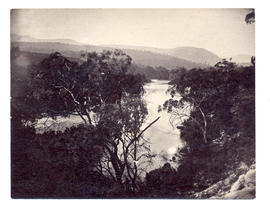
Photograph of the Derwent River above New Norfolk, Tasmania, 1882. The photographer was Henry Hall Baily who had studios in Elizabeth and Liverpool Streets, Hobart from 1865 until 1918.
Henry Hall Baily
Death of Lieutenant Governor David Collins
Part of Walker Family Papers
Lantern slide of the death of Lieutenant Governor David Collins, 1810. From The Derwent Star, and Van Diemen’s Land Intelligencer no. 7, Tuesday April 3rd 1810. Prepared by J.W. Beattie (1859-1930) whose studio locations were Elizabeth Street, Hobart from 1891-1920, Murray Street from 1921-40 and Cat and Fiddle until 1994.
John Watt Beattie
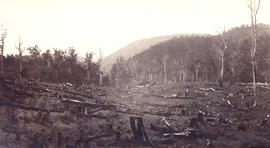
Dead trees on the side of Huon Road
Part of Walker Family Papers
Photograph of dead trees on the side of Huon Road, Hobart, Tasmania, c 1870.
James Backhouse Walker
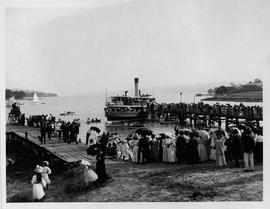
Crowd and ferry at the Lindisfarne Jetty
Part of Dennison Collection
Photograph of a large crowd and a packed ferry at the Lindisfarne Jetty. Rowing boats and yachts on the water.
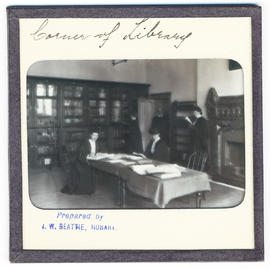
Corner of library, University of Tasmania, Queen's Domain, Hobart, late nineteenth century
Part of Walker Family Papers
Lantern slides of the University of Tasmania, Queen's Domain, Hobart. Views of exterior and laboratories and library. Prepared by J.W. Beattie (1859-1930) whose studio locations were Elizabeth Street, Hobart from 1891-1920, Murray Street from 1921-40 and Cat and Fiddle until 1994 (Collection Pr.S.Uni/1-8)
John Watt Beattie
Cook's Monument, Fern Tree Bower
Part of Walker Family Papers
Photographs of Cook's Monument, Fern Tree Bower, Mount Wellington. Memorial stones commemorate Mayor Henry Cook and the Hobart Town Corporation Waterworks erected in 1861.
James Backhouse Walker

Part of Walker Family Papers
Photograph of Macquarie Street, Hobart looking south from the corner of Elizabeth Street c. 1870. Some of Franklin Square on left Commercial Bank on right. The photographers were Anson Brothers whose firm was located in Liverpool, Collins and Elizabeth Streets between 1878 and 1891.
Anson Brothers
Part of Walker Family Papers
Photograph of the Commercial Bank, Macquarie Street, Hobart looking south from the corner of Elizabeth Street in c1877 after old St. Davids Cathedral was pulled down. The photograph is attributed to Henry Hall Baily who had studios in Elizabeth and Liverpool Streets Hobart from 1865 until 1918.
Henry Hall Baily
Commandant's house and jetties at Port Arthur
Part of Walker Family Papers
Photograph of the commandant's house and jetties, Port Arthur c. 1880. The photographers are Anson Brothers., Portrait and Landscape Photographers, Hobart Town whose firm was located in Liverpool, Collins and Elizabeth Streets between 1878 and 1891.
Anson Brothers
Part of Dennison Collection
Photograph of children playing on the foreshore. Thought to be in the Lindisfarne area.
Children fishing from the jetty
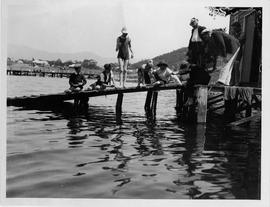
Part of Dennison Collection
Photograph of children fishing from the Lindisfarne Rowing Club jetty. Lindisfarne jetty in background.
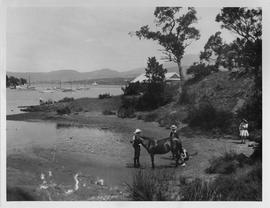
Children and pony on the beach
Part of Dennison Collection
Photograph of children and pony on the beach at a small cove on the eastern shore of the Derwent River.
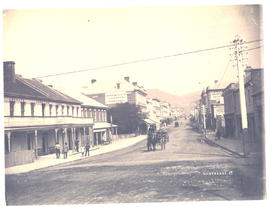
Part of Walker Family Papers
Photograph of Liverpool Street Hobart at the intersection of Argyle Street looking towards West Hobart, taken around the turn of the century showing Cherry's Carlton Club Hotel in the foreground. Also J. Whiteside & Son Furnishing Warehouse and Canes Iron mongers. The date is assumed from the presence of electric power poles which were introduced in 1898.
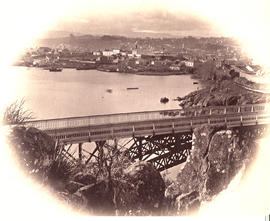
Cataract Bridge and Launceston
Part of Walker Family Papers
Photograph of Launceston, Tasmania from beyond the Cataract Bridge. The photographers were Anson Brothers who had studios in Liverpool, Collins and Elizabeth Streets, Hobart, between 1878 and 1891.
Anson Brothers
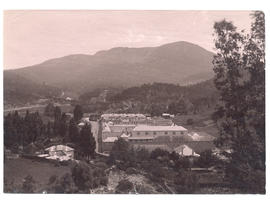
Cascades' Female Factory from the rear
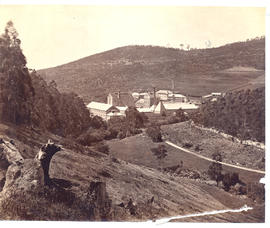
Part of Walker Family Papers
Photograph of the Cascades' Female Factory from the rear showing yards with washing and horse. In 1828 a Female Factory opened on the outskirts of Hobart at Cascades. It became the colony's largest Factory, expanding by 1853 into five major courtyards accommodating 1000 women and 175 children. The photographer was J.W. Beattie (1859-1930) whose studios were in Elizabeth and Murray Streets between 1891 and 1940
John Watt Beattie
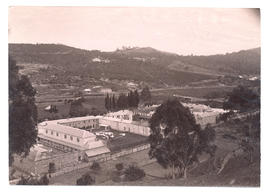
Cascades' Female Factory from the hill
Part of Walker Family Papers
Photograph of the Cascades' Female Factory looking down the South Hobart Valley toward the Derwent River. Showing yards and gardens. In 1828 a Female Factory opened on the outskirts of Hobart at Cascades. It became the colony's largest Factory, expanding by 1853 into five major courtyards accommodating 1000 women and 175 children. The photographer was J.W. Beattie (1859-1930) whose studios were in Elizabeth and Murray Streets between 1891 and 1940
John Watt Beattie
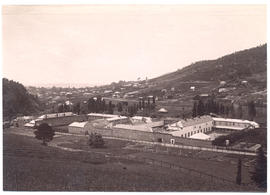
Part of Walker Family Papers
Photograph of the Cascades' Female Factory looking toward Mt Wellington with the Cascade Brewery in the distance. In 1828 a Female Factory opened on the outskirts of Hobart at Cascades. It became the colony's largest Factory, expanding by 1853 into five major courtyards accommodating 1000 women and 175 children. The photographer was J.W. Beattie (1859-1930) whose studios were in Elizabeth and Murray Streets between 1891 and 1940
John Watt Beattie
Part of Walker Family Papers
Photograph of the Cascade Brewery buildings from behind, Hobart, Tasmania. The photographers were Anson Brothers whose studios were located in Liverpool, Collins and Elizabeth Streets between 1878 and 1891.

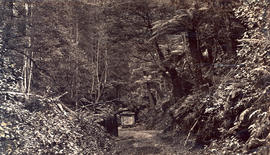
Cart on the road to Mt Wellington
Part of Walker Family Papers
Photograph of road to Mt Wellington showing man ferns and a two wheeled horse and cart
James Backhouse Walker
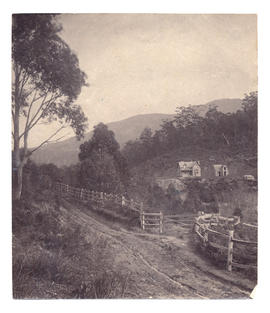
Caretakers house on dam of the reservoir
Part of Walker Family Papers
Photograph of caretakers house on dam of the reservoir, Waterworks Road, Hobart, Tasmania c.1870.
James Backhouse Walker
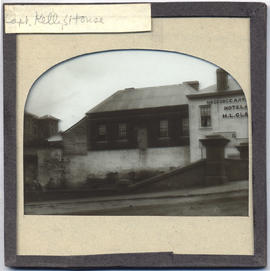
Part of Walker Family Papers
Lantern slide of Captain Kelly's house, Hobart, Tasmania. Thought to have been prepared by J.W. Beattie (1859-1930) whose studio locations were in Elizabeth Street, Hobart from 1891-1920, Murray Street from 1921-40 and Cat and Fiddle Arcade, Hobart, until 1994.
John Watt Beattie
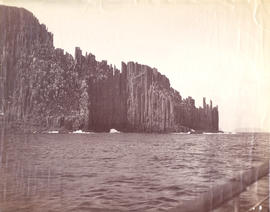
Part of Walker Family Papers
Photograph of Cape Pillar on the Tasman Peninsula.
Part of Walker Family Papers
Lantern slide of Campbell and Minchin building, corner Elizabeth and Bathurst street, Hobart. Prepared by J.W. Beattie (1859-1930) whose studio locations were Elizabeth Street, Hobart from 1891-1920, Murray Street from 1921-40 and Cat and Fiddle until 1994.
John Watt Beattie
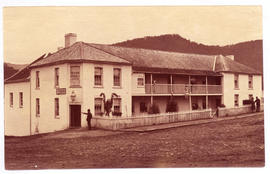
Part of Walker Family Papers
Photograph of the Bush Hotel, New Norfolk, Tasmania, 1881. Proprietor at the time was Captain Blockey. The photographer was Alfred Winter who had studios in Bathurst, Elizabeth and Liverpool Streets from 1869 until 1891.
Alfred Winter
Buildings, early Hobart, Tasmania
Part of Walker Family Papers
Lantern slide from the collection of James Backhouse Walker of buildings in early Hobart, Tasmania. Thought to have been prepared by J.W. Beattie (1859-1930) whose studio locations were in Elizabeth Street, Hobart from 1891-1920, Murray Street from 1921-40 and Cat and Fiddle Arcade, Hobart, until 1994.
John Watt Beattie
Buildings on the corner of Murray and Macquarie Street, Hobart ,Tasmania
Part of Walker Family Papers
Lantern slide from the collection of James Backhouse Walker of buildings on the corner of Murray and Macquarie Street, Hobart, Tasmania. Thought to have been prepared by J.W. Beattie (1859-1930) whose studio locations were in Elizabeth Street, Hobart from 1891-1920, Murray Street from 1921-40 and Cat and Fiddle Arcade, Hobart, until 1994. Quaker Collection.
John Watt Beattie
Buildings on the corner of Macquarie and Murray Streets
Part of Walker Family Papers
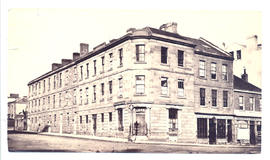
Photograph of buildings on corner of Macquarie and Murray Streets, Hobart c. 1877. Photographed by Henry Hall Baily who had studios in Elizabeth and Liverpool Streets, Hobart from 1865 until 1918.
Henry Hall Baily
Boats and ships on the harbour
Part of Walker Family Papers
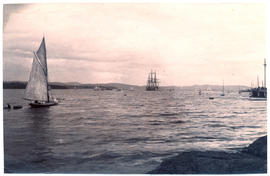
Photograph of boats and ships on the harbour in Hobart. c. 1880
Part of Walker Family Papers
Lantern slide of Bishop Nixon Prepared by J.W. Beattie (1859-1930) whose studio locations were Elizabeth Street, Hobart from 1891-1920, Murray Street from 1921-40 and Cat and Fiddle until 1994.
John Watt Beattie
Big Witch from Maatsuyker Island
Part of Walker Family Papers
Photograph of Big Witch from Maatsuyker Island, taken on the day of the opening of the lighthouse in 1891
Part of Walker Family Papers
Photograph of Battery Point from Sandy Bay, Tasmania, with St. Helena, later Wrest Point, in foreground, St Georges Church in the distance, c.1881. The photographer was Alfred Winter who had studios in Bathurst, Elizabeth and Liverpool Streets from 1869 until 1891.
James Backhouse Walker
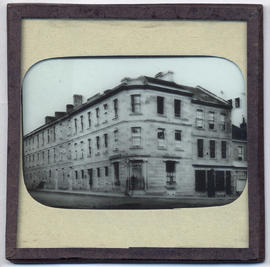
Bank of Australasia and Macquarie House
Part of Walker Family Papers
Photograph of Macquarie Street, Hobart looking south in about 1870. The Bank of Australasia and Macquarie House are two of the buildings featured. The photographer is Henry Hall Baily who had studios in Elizabeth and Liverpool Streets between 1865 and 1918.
Henry Hall Baily
Part of Walker Family Papers
Photograph of Austins Ferry, Hobart, Tasmania, with Austin's old Inn to the right. The photographer was Alfred Winter who had studios in Bathurst, Elizabeth and Liverpool Streets from 1869 until 1891.
James Backhouse Walker
All Saints Church Macquarie Street
Part of Walker Family Papers
Photograph of All Saints Church, Macquarie Street, Hobart c. 1880 by Anson Brothers, Portrait and Landscape Photographers, Hobart Town, whose firm was located in Liverpool, Collins and Elizabeth Streets between 1878 and 1891.
Anson Brothers
Part of Dennison Collection
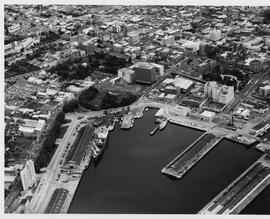
Aerial view of the Hobart harbour showing Salamanca Place, Watermans dock, Parliamentary House , Hydro Building, Elizabeth Street pier, the Marine Board building under construction, Franklin Square and St, David's Park.
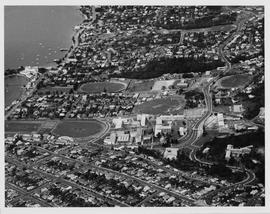
Aerial view of UTAS Sandy Bay Campus
Part of Dennison Collection
Aerial view of the Sandy Bay Campus of the University of Tasmania. Showing sporting fields, Hutchins School, surrounding houses and Wrest Point Hotel prior to the construction of the casino

Part of Dennison Collection
Aerial view of the Zinc Works at Derwent Park. Looking down the Derwent River toward the Tasman Bridge. Showing Self's Point and Cornelian Bay Cemetery
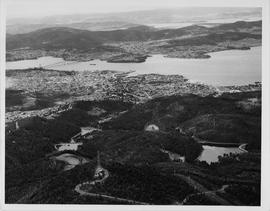
Aerial view of the Ridgeway Reservoir
Part of Dennison Collection
Aerial view of the Ridgeway Reservoir and Waterworks Reserve looking to Hobart, the Tasman Bridge and beyond to the Eastern Shore, Seven Mile Beach and Dodges Ferry
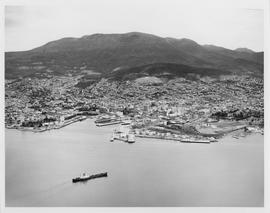
Aerial view of of the port of Hobart
Part of Dennison Collection
Aerial view of of the port of Hobart showing Macquarie Point, the wharf area and Mount Wellington in the background
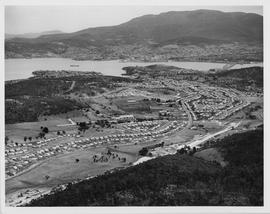
Aerial view of Mornington and Warrane
Part of Dennison Collection
Aerial photograph of Mornington and Warrane c. 1970 looking toward the Tasman Bridge and Hobart
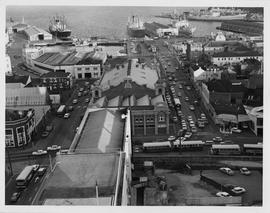
Aerial view of City Hall and port
Part of Dennison Collection
Aerial view of City Hall, Museum and Art Gallery and the port of Hobart, Constitution and Victoria Docks and wharfs
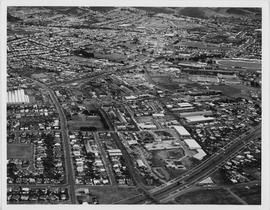
Aerial view of Brooker Highway
Part of Dennison Collection
Aerial view of Brooker Highway, Hobart looking toward the show grounds and Derwent Park
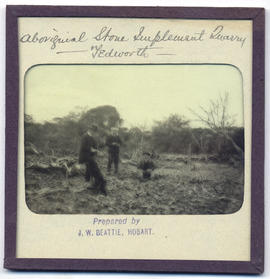
Part of Walker Family Papers
Lantern slide of an aboriginal implement quarry at Tedworth. Prepared by J.W. Beattie (1859-1930) whose studio locations were Elizabeth Street, Hobart from 1891-1920, Murray Street from 1921-40 and Cat and Fiddle until 1994.
John Watt Beattie

Part of Walker Family Papers
Lantern slide of aboriginal caves at Tedworth. Prepared by J.W. Beattie (1859-1930) whose studio locations were Elizabeth Street, Hobart from 1891-1920, Murray Street from 1921-40 and Cat and Fiddle until 1994.
John Watt Beattie